iRedMail xidmətlərini Samba4 AD DCyə necə konfiqurasiya etmək və inteqrasiya etmək 11ci hissə
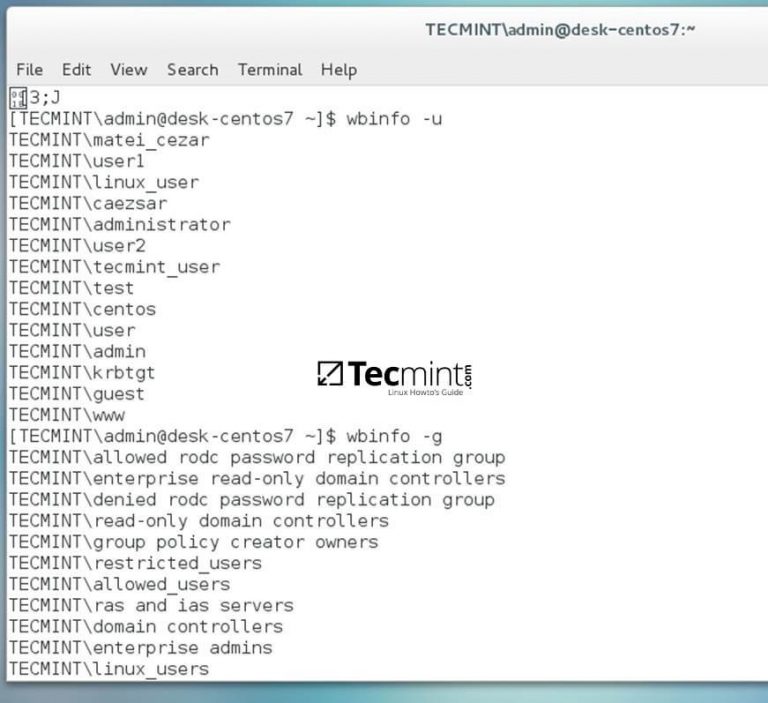
Integrate CentOS 7 to Samba4 AD from Commandline Part 14
This tutorial describes how to setup Samba Primary Domain Controller in CentOS 7. This setup was tested in CentOS 7 minimal server, although the same steps should work on RHEL 7 and Scientific Linux 7 as well. Scenario I will be using two systems as mentioned below for the purpose of this article. Samba PDC: OS: CentOS 7 Minimal server
CentOS 6 Samba4 AD DC Join in Domain Server World
I performed a Samba 4 Active Directory Domain Controller install in June of. 2015 on CentOS 7. At that time I used the Samba 4.1.XX package from SerNet due to the absence of necessary heimdal packages and libraries not provided in the CentOS 7. Samba package. Since the the 4.1 series is on security fix only, I'd like to upgrade to the latest.

iRedMail xidmətlərini Samba4 AD DCyə necə konfiqurasiya etmək və inteqrasiya etmək 11ci hissə
In this tutorial, I will show you how to configure Samba 4 as a domain controller with Windows 10, CentOS 7 and CentOS 6 clients. In this tutorial, I will compile Samba 4 from source. If you are seeking for a Samba 4 RPM based installation and SELinux configuration for Samba 4, please see my new Samba 4 tutorial here.

Join an Additional Ubuntu DC to Samba4 AD DC for FailOver Replication Part 5
sudo dnf install samba samba-dc samba-client krb5-workstation Samba installation Configurations. For setting up Samba as an AD and Domain Controller, you will have to prepare the environment with a functional configuration before you start using it. Hostname. Ensure the hostname of your server is set to its fully-qualified domain name (FQDN).

Join CentOS 7 Desktop to Samba4 AD as a Domain Member
Samba AD DC can be managed through samba-tool command line utility which offers a great interface for administrating your domain. With the help of samba-tool interface you can directly manage domain users and groups, domain Group Policy, domain sites, DNS services, domain replication and other critical domain functions.

12. CentOS. Samba4 AD DC. Server provisioning. Бөлім 5. (қазақша) YouTube
In this tutorial, I will show you how to configure Samba 4 as a domain controller with Windows 10, CentOS 7 and CentOS 6 clients. In this tutorial, I will compile Samba 4 from source. I.

如何在 CentOS 7 上安装 iRedMail 《Linux就该这么学》
This page describe Samba4 Active Directory installation on CentOS 7. The environment is composed by 2 DCs with replication, and one fileserver. Contents 1 Enviroment 2 Installation 2.1 Pre-Setup 2.1.1 DC1 Setup 2.1.2 DC2 Setup 2.2 Post Setup 3 Fileserver Setup 3.1 Prep, auth and join 3.2 Services configuration 3.3 Shares 4 Useful 5 Troubleshooting
如何在 CentOS 7 上安装 iRedMail MMCloud
CentOS 7 : Samba AD DC : Install : Server World Samba AD DC : Configure Server 2018/06/27 [root@smb ~]# yum groups -y install "Development Tools" [root@smb ~]# yum -y install iniparser libldb libtalloc libtdb libtevent python-devel gnutls-devel libacl-devel openldap-devel pam-devel readline-devel krb5-devel cups-devel [root@smb ~]#
GitHub charlietag/Samba4_AD_RSAT CentOS 8 Samba4 with Active Directory Domain Controllers
Starting from version 4.0, Samba is able to run as an Active Directory (AD) domain controller (DC). In this tutorial, I will show you how to configure Samba 4 28 C. Ho Chi Minh City. Saturday, December 23, 2023. Client authentication with Samba 4 on CentOS 7. 192.168.1.22 - client Authentication on CentOS 7. Installation of packages:

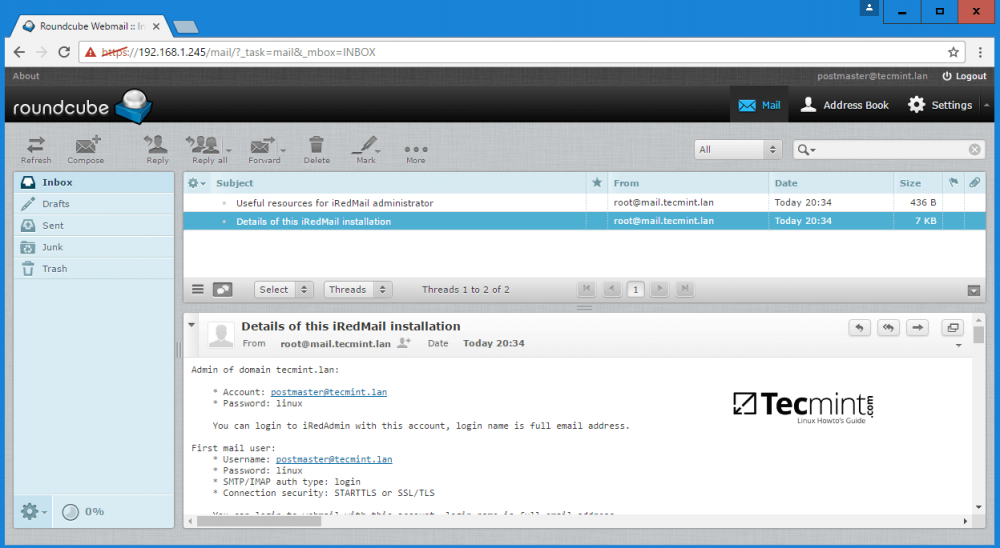
系统运维Samba 系列(十二):如何在 Samba4 AD 中集成 iRedMail Roundcube
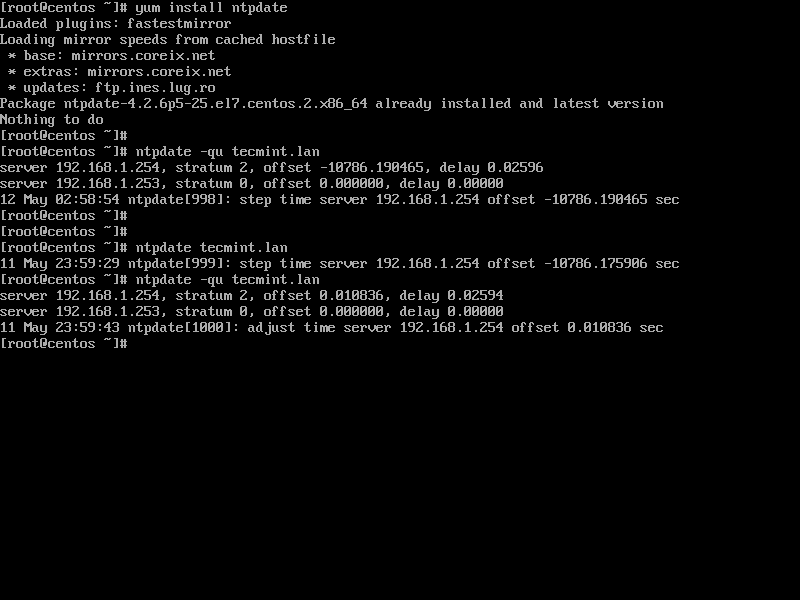
Requirements Create an Active Directory Infrastructure with Samba4 on Ubuntu CentOS 7.3 Installation Guide Step 1: Configure CentOS for Samba4 AD DC 1. Before starting to join CentOS 7 Server into a Samba4 DC you need to assure that the network interface is properly configured to query domain via DNS service.

Samba 系列(十五):用 SSSD 和 Realm 集成 Ubuntu 到 Samba4 AD DC 简书
April 6, 2017. 3264. Starting from version 4.0, Samba is able to run as an Active Directory (AD) domain controller (DC). In this tutorial, I will show you how to configure Samba 4 as a domain controller with Windows 10, CentOS 7 and CentOS 6 clients. I will be using 3 Systems, one CentOS 7 server and a Windows 10 client for remote management, a.

Instalando un servidor Samba4 DC en CentOS 7 YouTube
To install it on your CentOS system run the following command: sudo yum install samba samba-client. Once the installation is completed, start the Samba services and enable them to start automatically on system boot: sudo systemctl start smb.service sudo systemctl start nmb.service.
Samba 系列(六):使用 Rsync 命令同步两个 Samba4 AD DC 之间的 SysVol 目录 自由微信 FreeWeChat
Samba 4 with Active directory on CentOS 7 rpm based installation with share support Configure Secondary Domain Controller AD2 On server 192.168.1.170,dc.sunil.cc - (Secondary Domain Controller or Additional Domain Controller) do: We will be using Centos 7 as the basis, SELinux is enabled. [root@dc ~]# yum -y update Selinux is enabled.
系统运维Samba 系列(十四):在命令行中将 CentOS 7 与 Samba4 AD 集成
Step 1: Configure CentOS Network for Samba4 AD DC 1. Before starting to join CentOS 7 Desktop to a Samba4 domain you need to assure that the network is properly setup to query domain via DNS service. Open Network Settings and turn off the Wired network interface if enabled.

Join CentOS 7 Desktop to Samba4 AD as a Domain Member
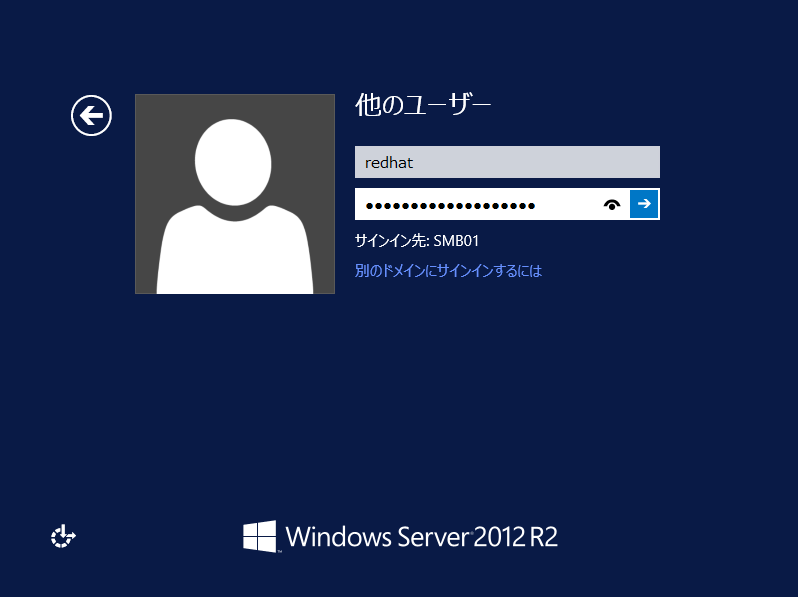
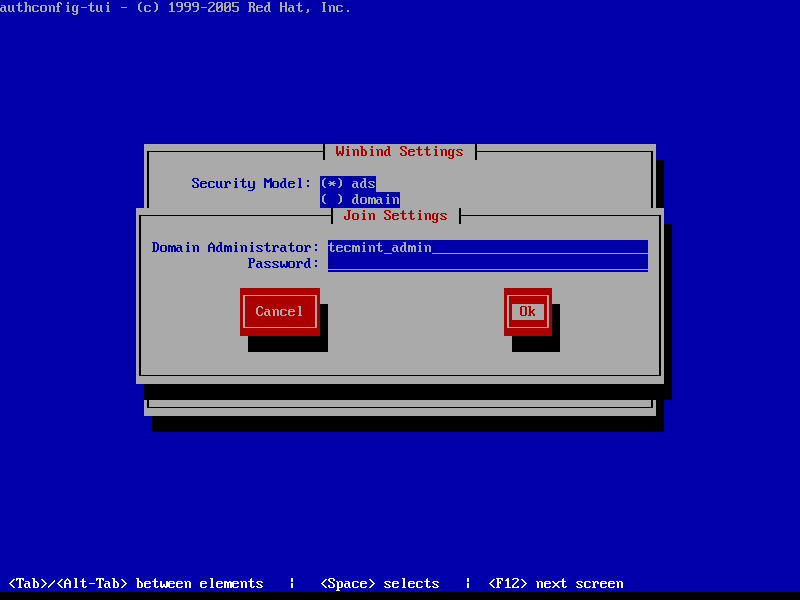
Step 2: Join CentOS 7 Server to Samba4 AD DC. 6. To join CentOS 7 server to Samba4 Active Directory, first install the following packages on your machine from an account with root privileges. # yum install authconfig samba-winbind samba-client samba-winbind-clients 7. In order to integrate CentOS 7 server to a domain controller run authconfig.
Join CentOS 7 Desktop to Samba4 AD as a Domain Member
Step 1: Configure CentOS Network for Samba4 AD DC. 1. Before starting to join CentOS 7 Desktop to a Samba4 domain you need to assure that the network is properly setup to query domain via DNS service. Open Network Settings and turn off the Wired network interface if enabled. Hit on the lower Settings button as illustrated in the below.
