Breadboard Layout Arduino Lesson 13. DC Motors Adafruit Learning System
Control Pid De Un Motor Dc Con Arduino MOMCUTE
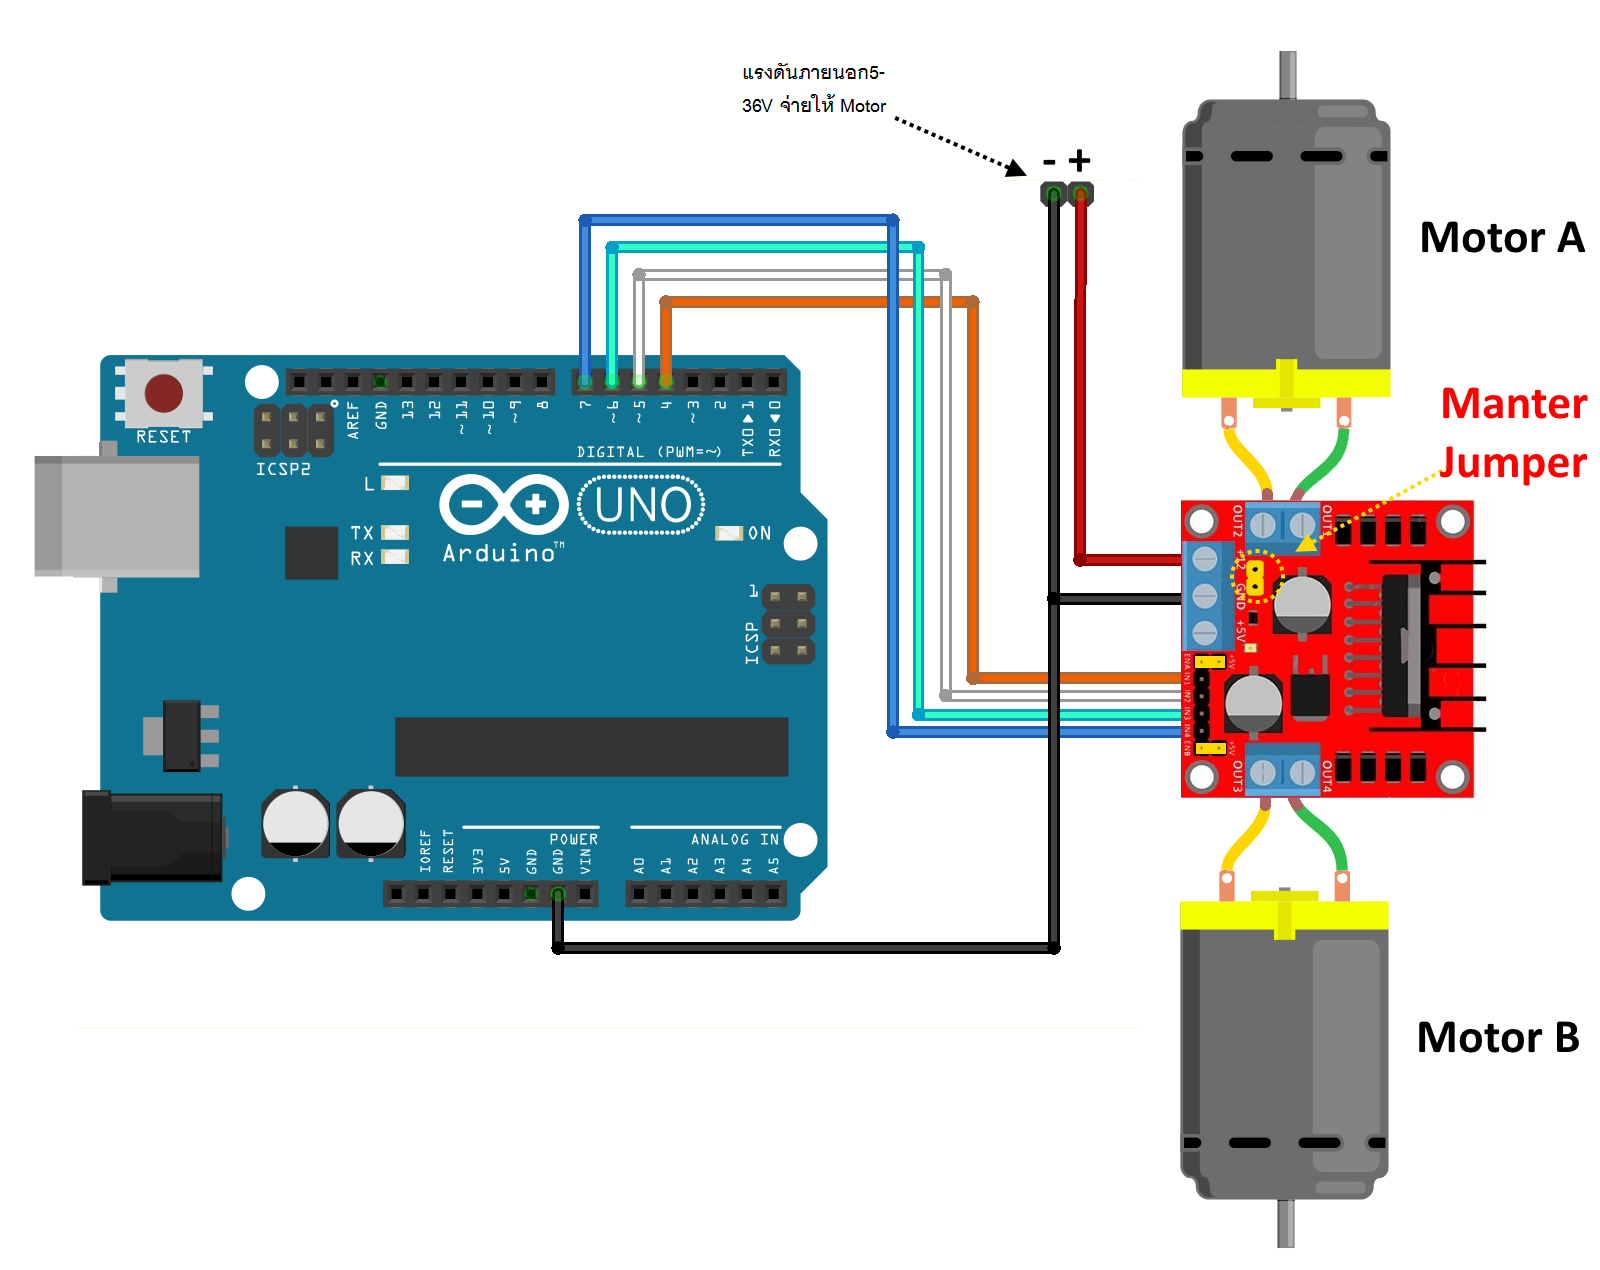
const int enB = 9; const int in3 = 7; const int in4 = 8; void setup () { // set all the motor control pins to outputs pinMode (enB, OUTPUT); pinMode (in3, OUTPUT); pinMode (in4, OUTPUT); } void loop () { // turn on motor B digitalWrite (in3, HIGH); digitalWrite (in4, LOW); // set speed to 200 out of possible range 0~255 analogWrite (e.

Arduino DC Motor Controller PHPoC Forum
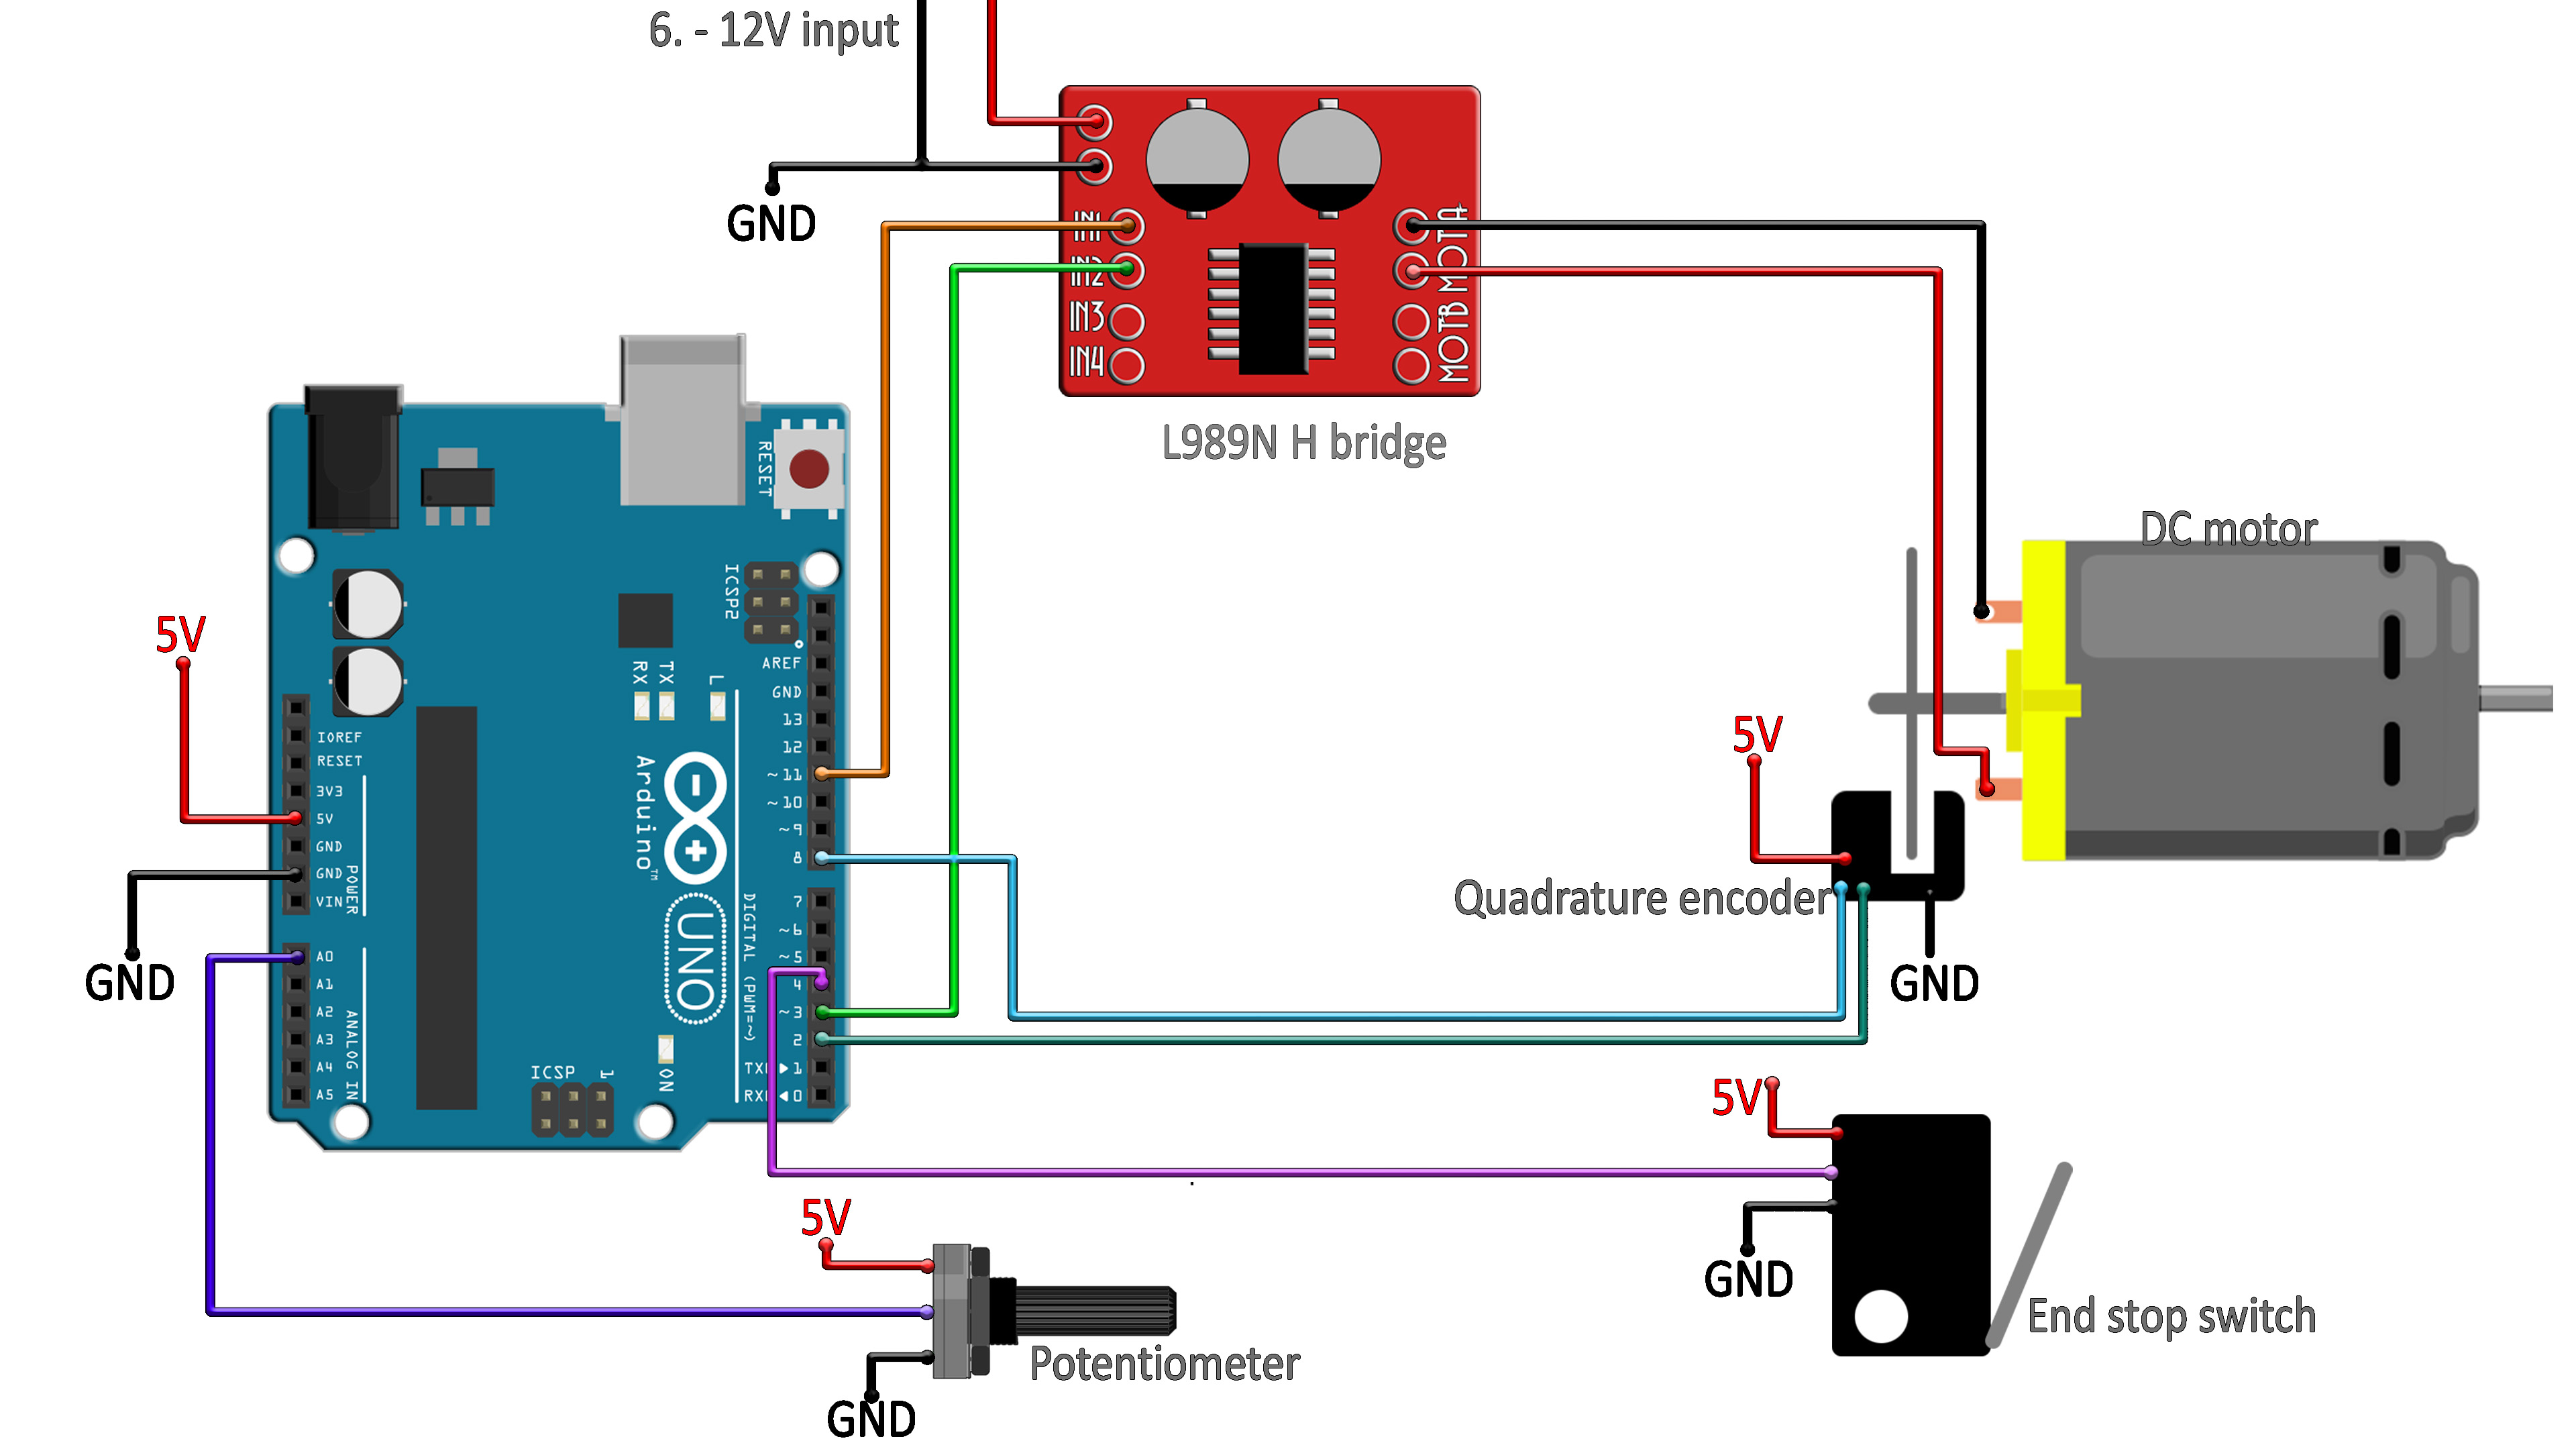
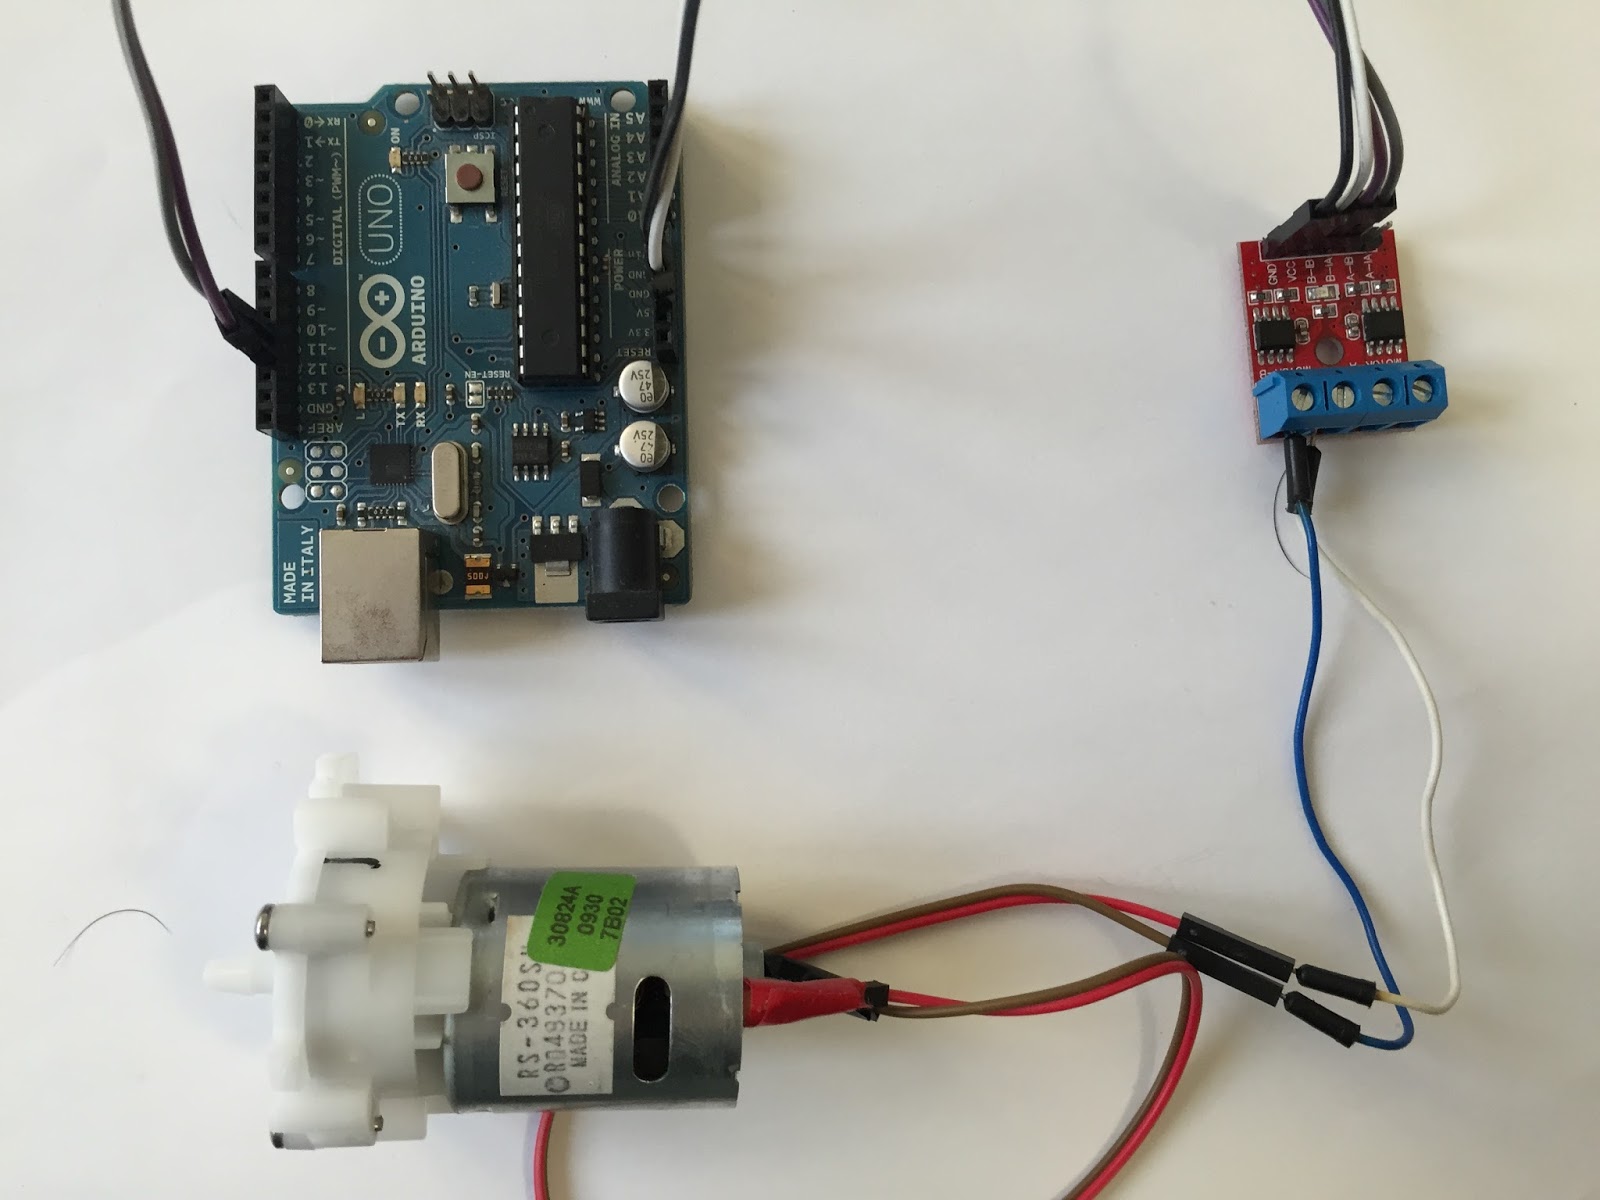
The control of a DC motor using an encoder is not that simple, you just simply can't start by adding an encoder with the DC Motor and start controlling the DC motor, to use an encoder you will need a controller, the controller will read the encoder and then will accordingly control the DC motor as per the pre-defined instructions written by the.

Motores DC con Arduino. Varios ejemplos
Circuit. Let's begin by mounting our Arduino Motor Shield Rev3 on top of an Arduino UNO. Mounting the shield. Now, let's connect the motor to the A channel, following the image below. The channels are marked next to the screw terminals on the shield. Connecting a power source and DC motor. Finally, we can connect the USB cable to the computer.

Controlar Un Motor Dc Con Arduino Paso 3 Serie Comunicacion El Images
Device Control Arduino DCMotor library with the L293D motor driver. The Arduino DCMotor library provides a simple and modular way to manage a DC motor connected to an Arduino board using the L293D motor driver. Author: Graziano Blasilli Maintainer: Graziano Blasilli Read the documentation Compatibility

Controlando Motores DC com o Arduino Laboratório de Eletrônica
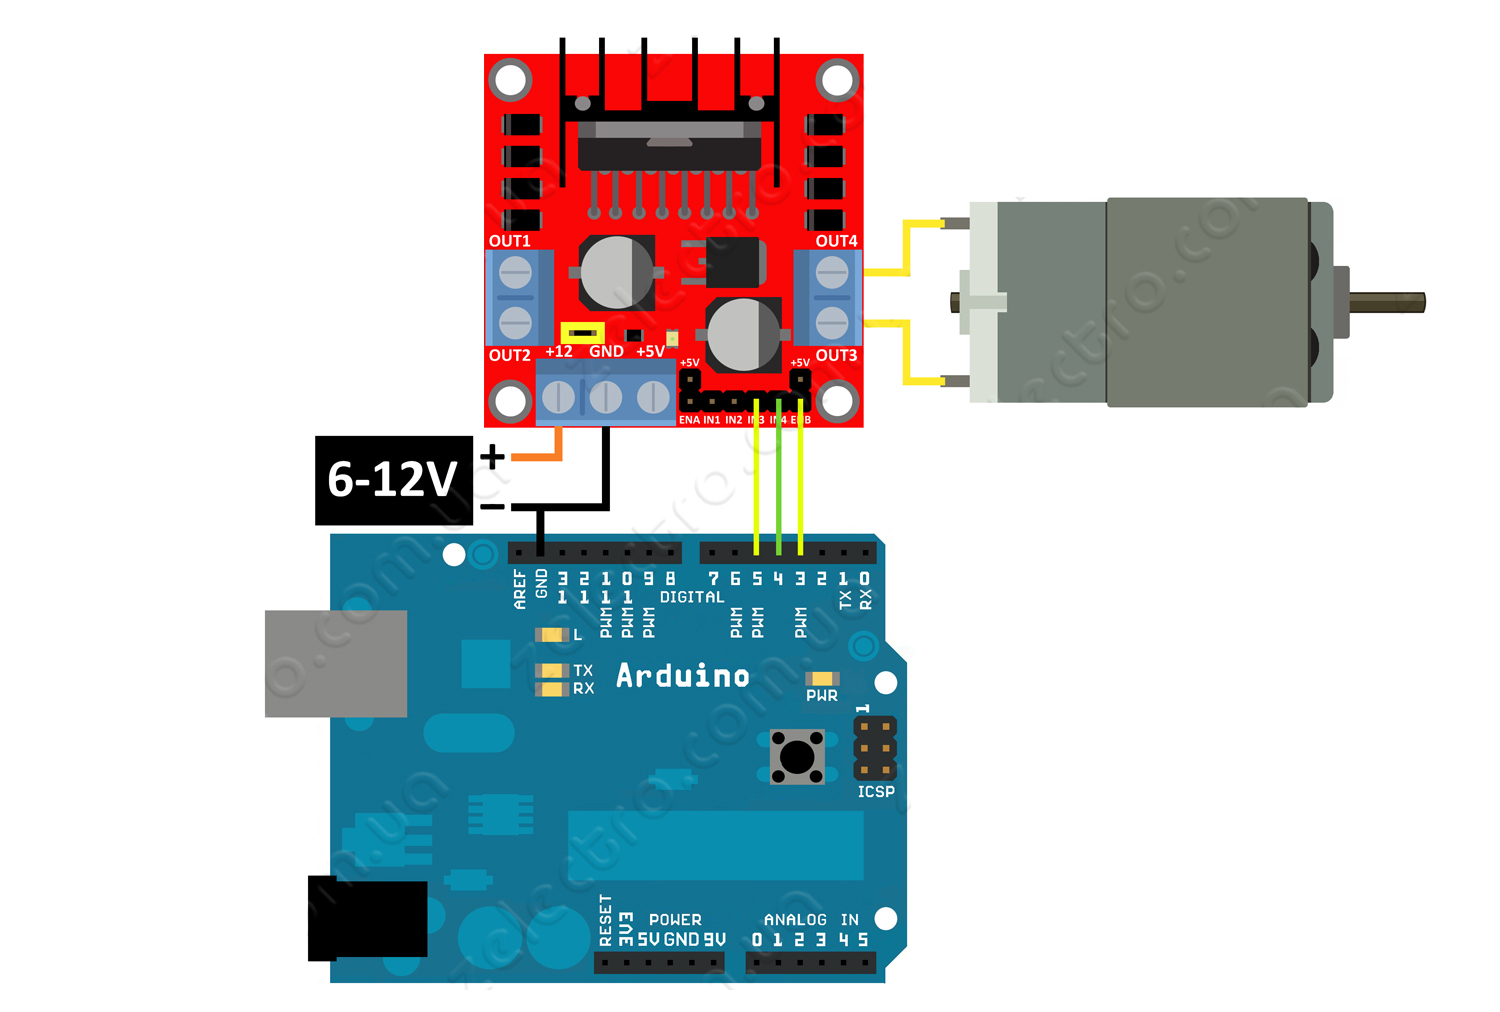
1. BRAKE. IN1 pin of the L298 IC is connected to pin 8 of the Arduino while IN2 is connected to pin 9. These two digital pins of Arduino control the direction of the motor. The EN A pin of IC is connected to the PWM pin 2 of Arduino. This will control the speed of the motor.
Arduino ควบคุม DC Motor ด้วย L298 Arduino Projects
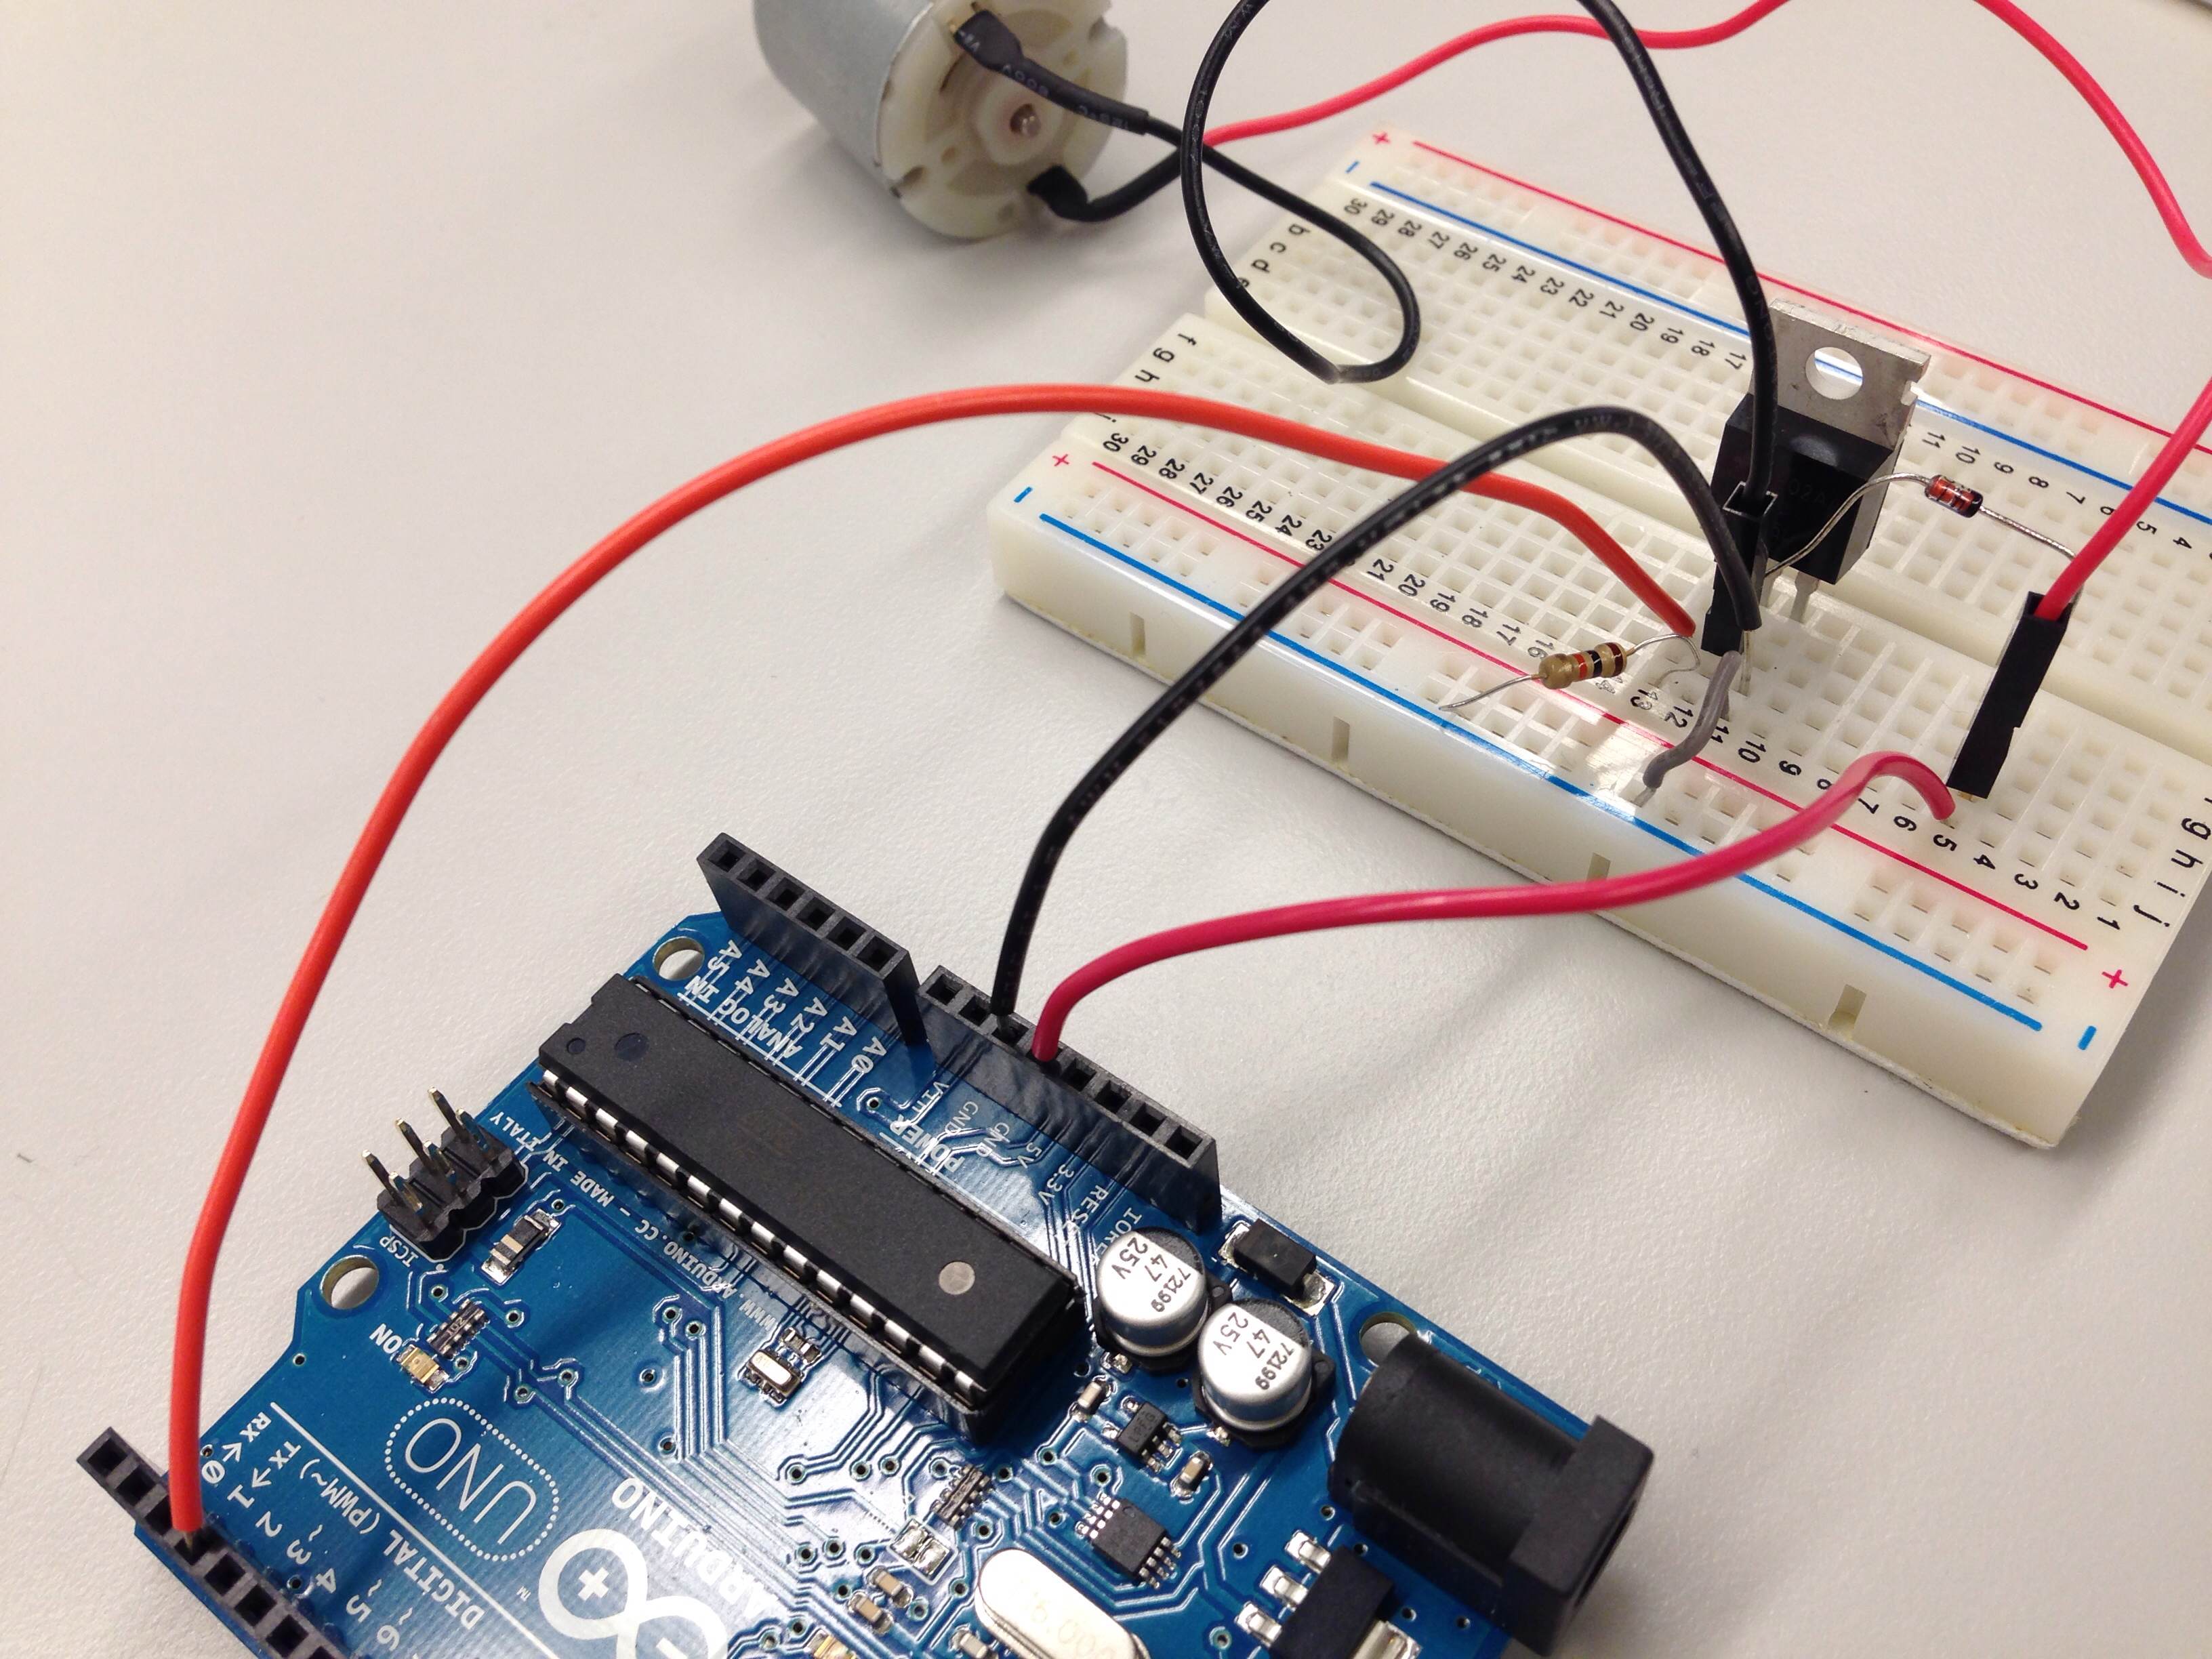
Attach the base of your TIP120 transistor to digital pin 9 on the Arduino, the emitter to the Arduino's ground, and the collector to one lead of your DC motor. Place a 1N4001 diode across the motor's leads, ensuring that the striped side is connected to the 9V positive lead. Power the motor with a 9V battery, connecting the ground to the.
EVO24V100 Brushed DC Motor Driver 100A for R/C Receiver PWM Arduino nodeMCU Industrial
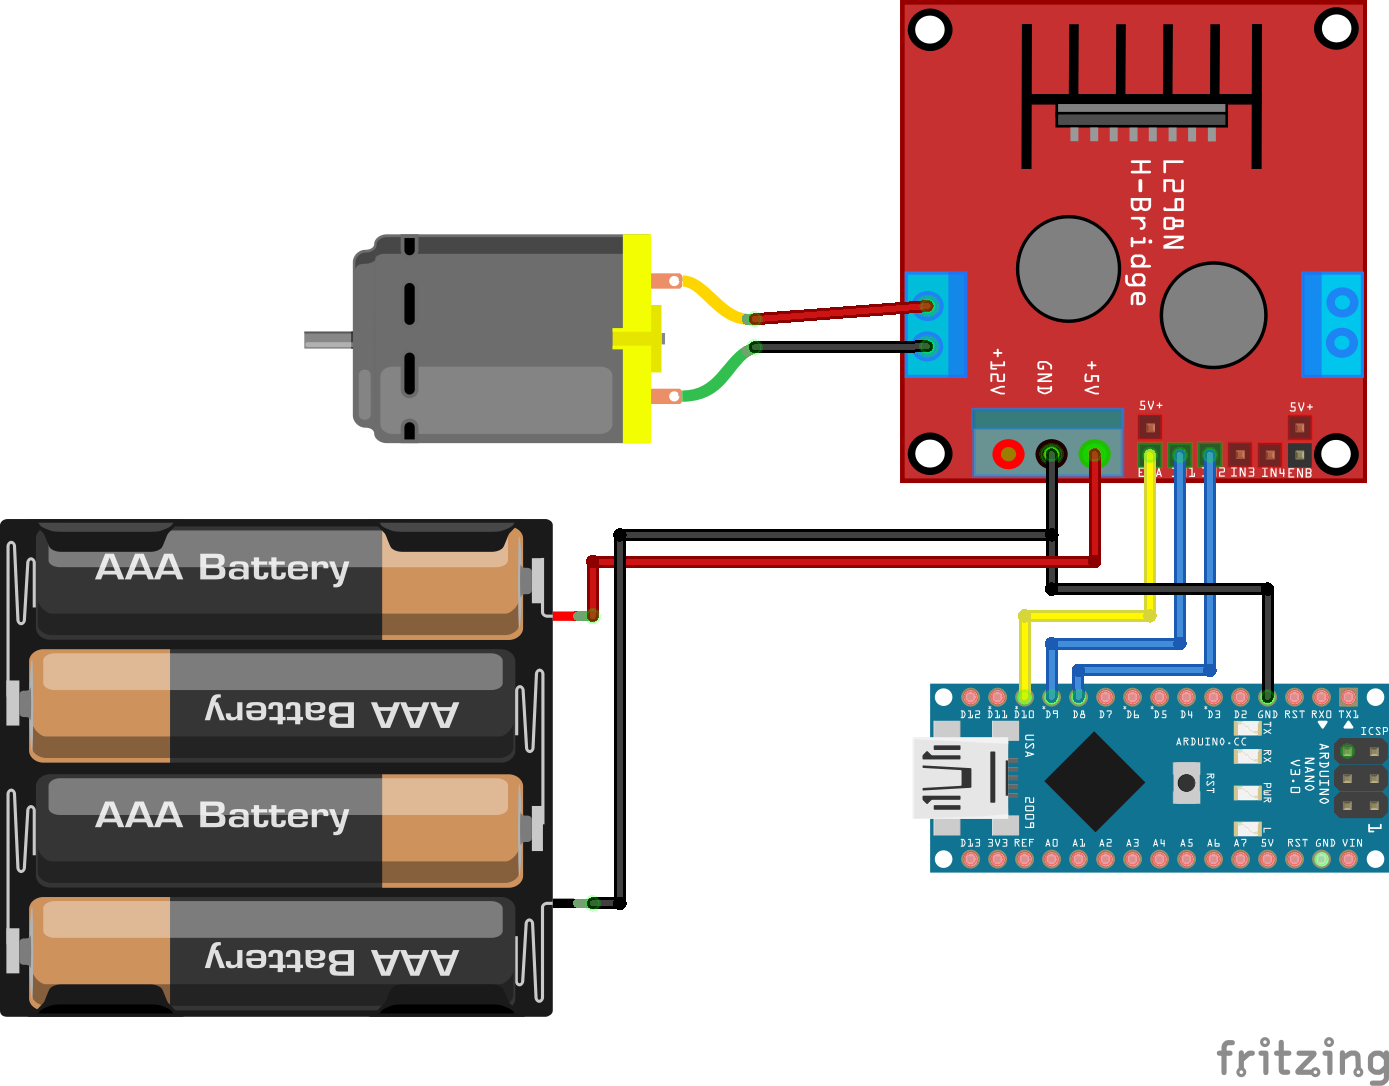
How It Works When you buy a DC motor, you need to know what voltage DC motor work. Let's take a 12V DC motor as an example. When you power the 12V DC motor by a 12V power source: 12V and GND to the positive wire and negative wire, respectively: the DC motor rotates at maximum speed in the clockwise direction
Running a DC motor from the Arduino Using the Creatron Economic Starter Kit Susan Elliott Sim
Step 2: Arduino UNO to L293D IC Connections. Now, Connect Arduino digital output Pin 10 and 9 to Pin 2 (Input_1) and Pin 7 (Input_2) of L293D for Motor_1. Similarly, connect Arduino digital Pin 4 and 3 to Pin 10 (Input_3) and Pin 15 (Input_4) of L293D for Motor_2.
Motor DC con Arduino, potenciómetro y alimentación de 9V YouTube
To do this: Connect an Arduino Nano pin to the ENA of L298N. Generate a PWM signal to the ENA pin through analogWrite () function. The L298N Driver will amplify the PWM signal to the DC motor. . analogWrite(ENA_PIN, speed); // speed is a value from 0 to 255. The speed is a number ranging from 0 to 255.
Tutorial Aprender a usar el driver para motores DC (L9110) con Arduino LuneGate
Lo primero que se nos puede ocurrir es conectar el motor DC a un GPIO del Arduino directamente, pero NO LO HAGAIS, ya que en cuanto pongáis el GPIO a 5V, el Arduino echará fuego, literalmente. Las GPIOs de los Arduinos solo pueden sacar 10-15mA, mientras que un motor, por pequeño que sea va a pedirte 100-200mA, así que cuidado con esto.

Controlling DC Motors with Arduino Arduino L298N Tutorial Hackster.io
Encoder motors are cool to make more advanced Arduino projects and are actually quite simple to use. In this video, I will show you how to control a DC motor with an encoder with Arduino..

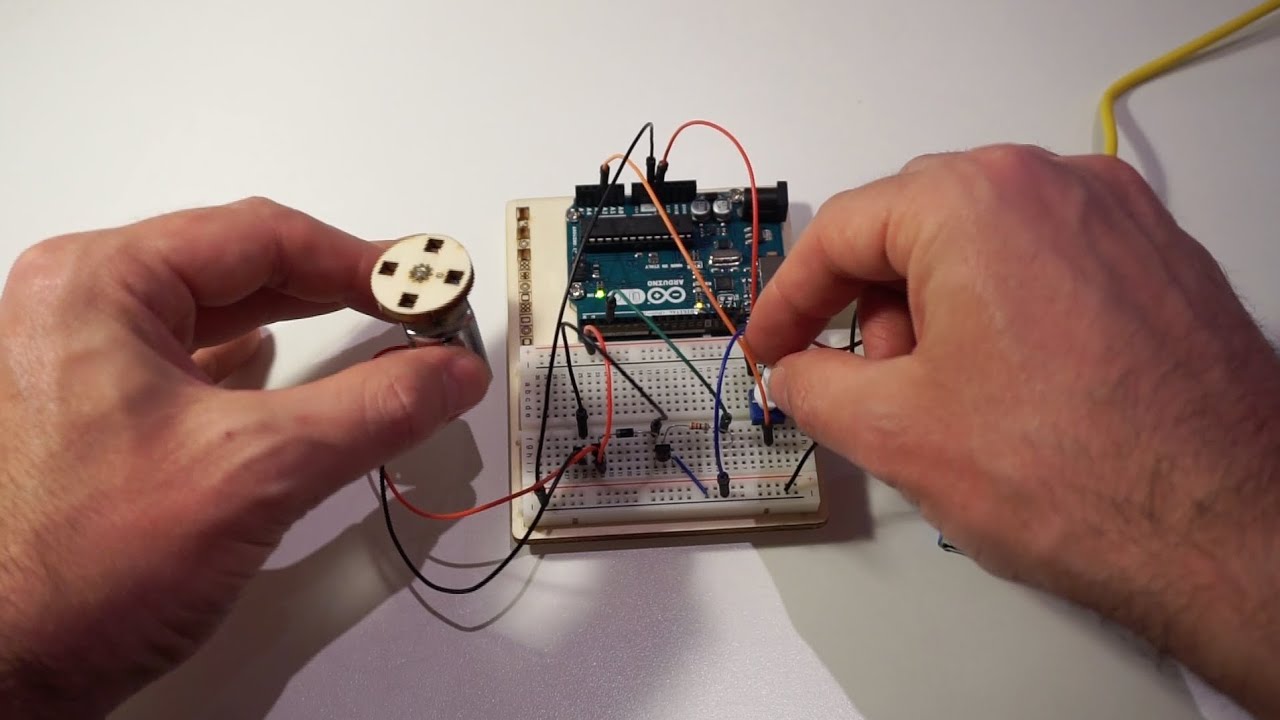
Control DC motor with NPN transistor & Arduino PWM Arduino Project Hub
Step 1: What You Will Need For this tutorial you will need: Arduino uno Breadboard 220 Ohm resistor Transistor P2N2222A Diode 1N4148 DC Motor Ask Question Step 2: The Circuit The connections are easy, see the image above with the breadboard circuit schematic. Diode in circuit:
Tutorial Uso Driver L298N para motores DC y paso a paso con Arduino
Let's demonstrate how to use the TIP120 on the Arduino by building an example project that controls the speed of a DC motor with a potentiometer. To build this example project, you'll need the following parts: Arduino Pro-Mini, or Arduino Uno. TIP120 Darlington transistor. DC motor (5-9 Volts)

CONTROL DE VELOCIDAD DE UN MOTOR DC CON UN TRANSISTOR NPN Y ARDUINO YouTube
Connection Between Arduino, Motor & L293D - Pin No. 1, 8, 9, 16 of L293D IC is connected to 5V - Pin No's 4, 5, 12, and 13 are the ground pins; connect these to GND. Working of DC Motor Control using MPU6050 Gyro/Accelerometer Whenever we move the sensor in the upward or downward direction, the sensor gives the output from -17000 to.
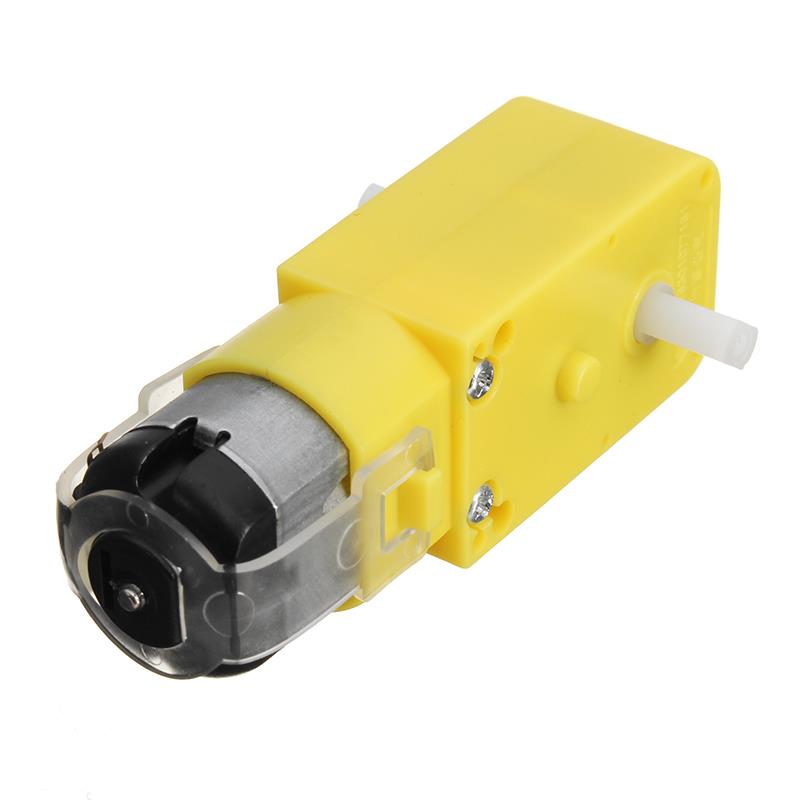
DC3V6V DC 148 Gear Motor TT Motor Forarduino Smart Car Robot DIY
A PWM pin will be used to control the speed of the motor. Similarly, place the second "Digital Write". Place the "PWM write pin" Block on the LabVIEW "Block Diagram" panel. Place "Close Block" as follows: This process results in the following LabVIEW Block diagram: Click on the white space on "Block Diagram" and follow.
Control de motores DC con Arduino (motor shield) Robot básico YouTube
Connect the +5V output of the Arduino to one leg of the 1N4002 diode, with the other lead of the diode connected to one lead of the DC motor. Connect the other lead of the DC motor to the emitter of the NPN transistor, and also connect the collector of the transistor to the GND of the Arduino. To control the transistor, connect a 270-ohm.
