How to Use Relays to Control HighVoltage Circuits with an Arduino Projects
Control High Voltage Devices with an Arduino The Geek Pub
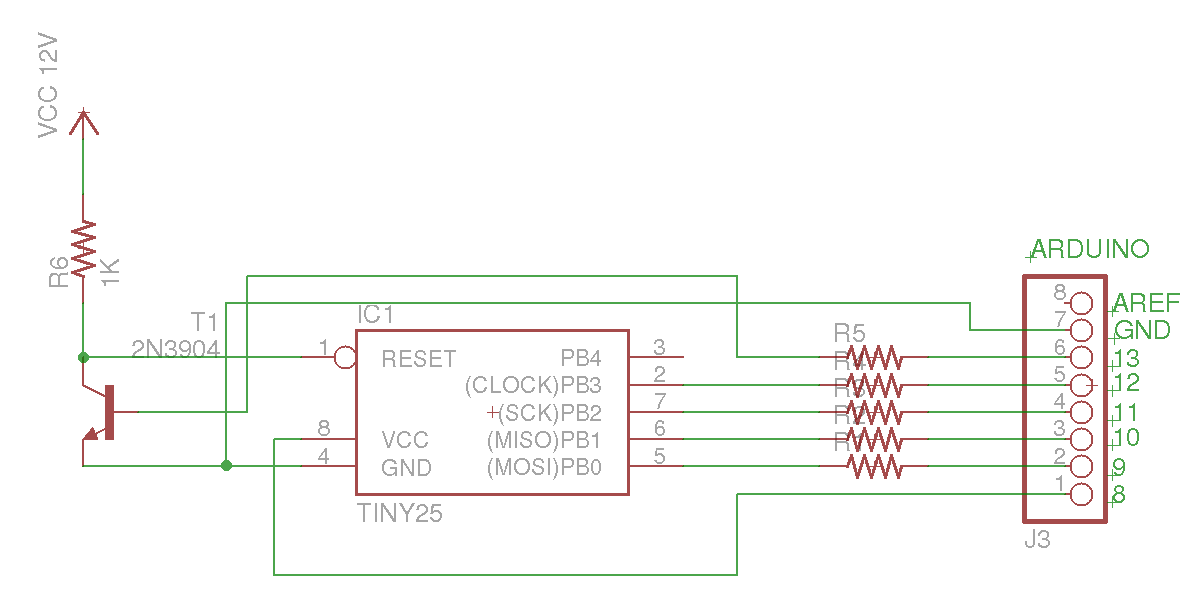
HV Rescue Simple By dmjlambert in Circuits Arduino 30,374 21 42 Download By dmjlambert Follow More by the author: About: These Arduinos are driving me up the wall. More About dmjlambert » High voltage programming of ATmega328P and other Atmel chips on a breadboard
Recover Bricked ATtiny Using Arduino as high voltage programmer ElectronicsLab
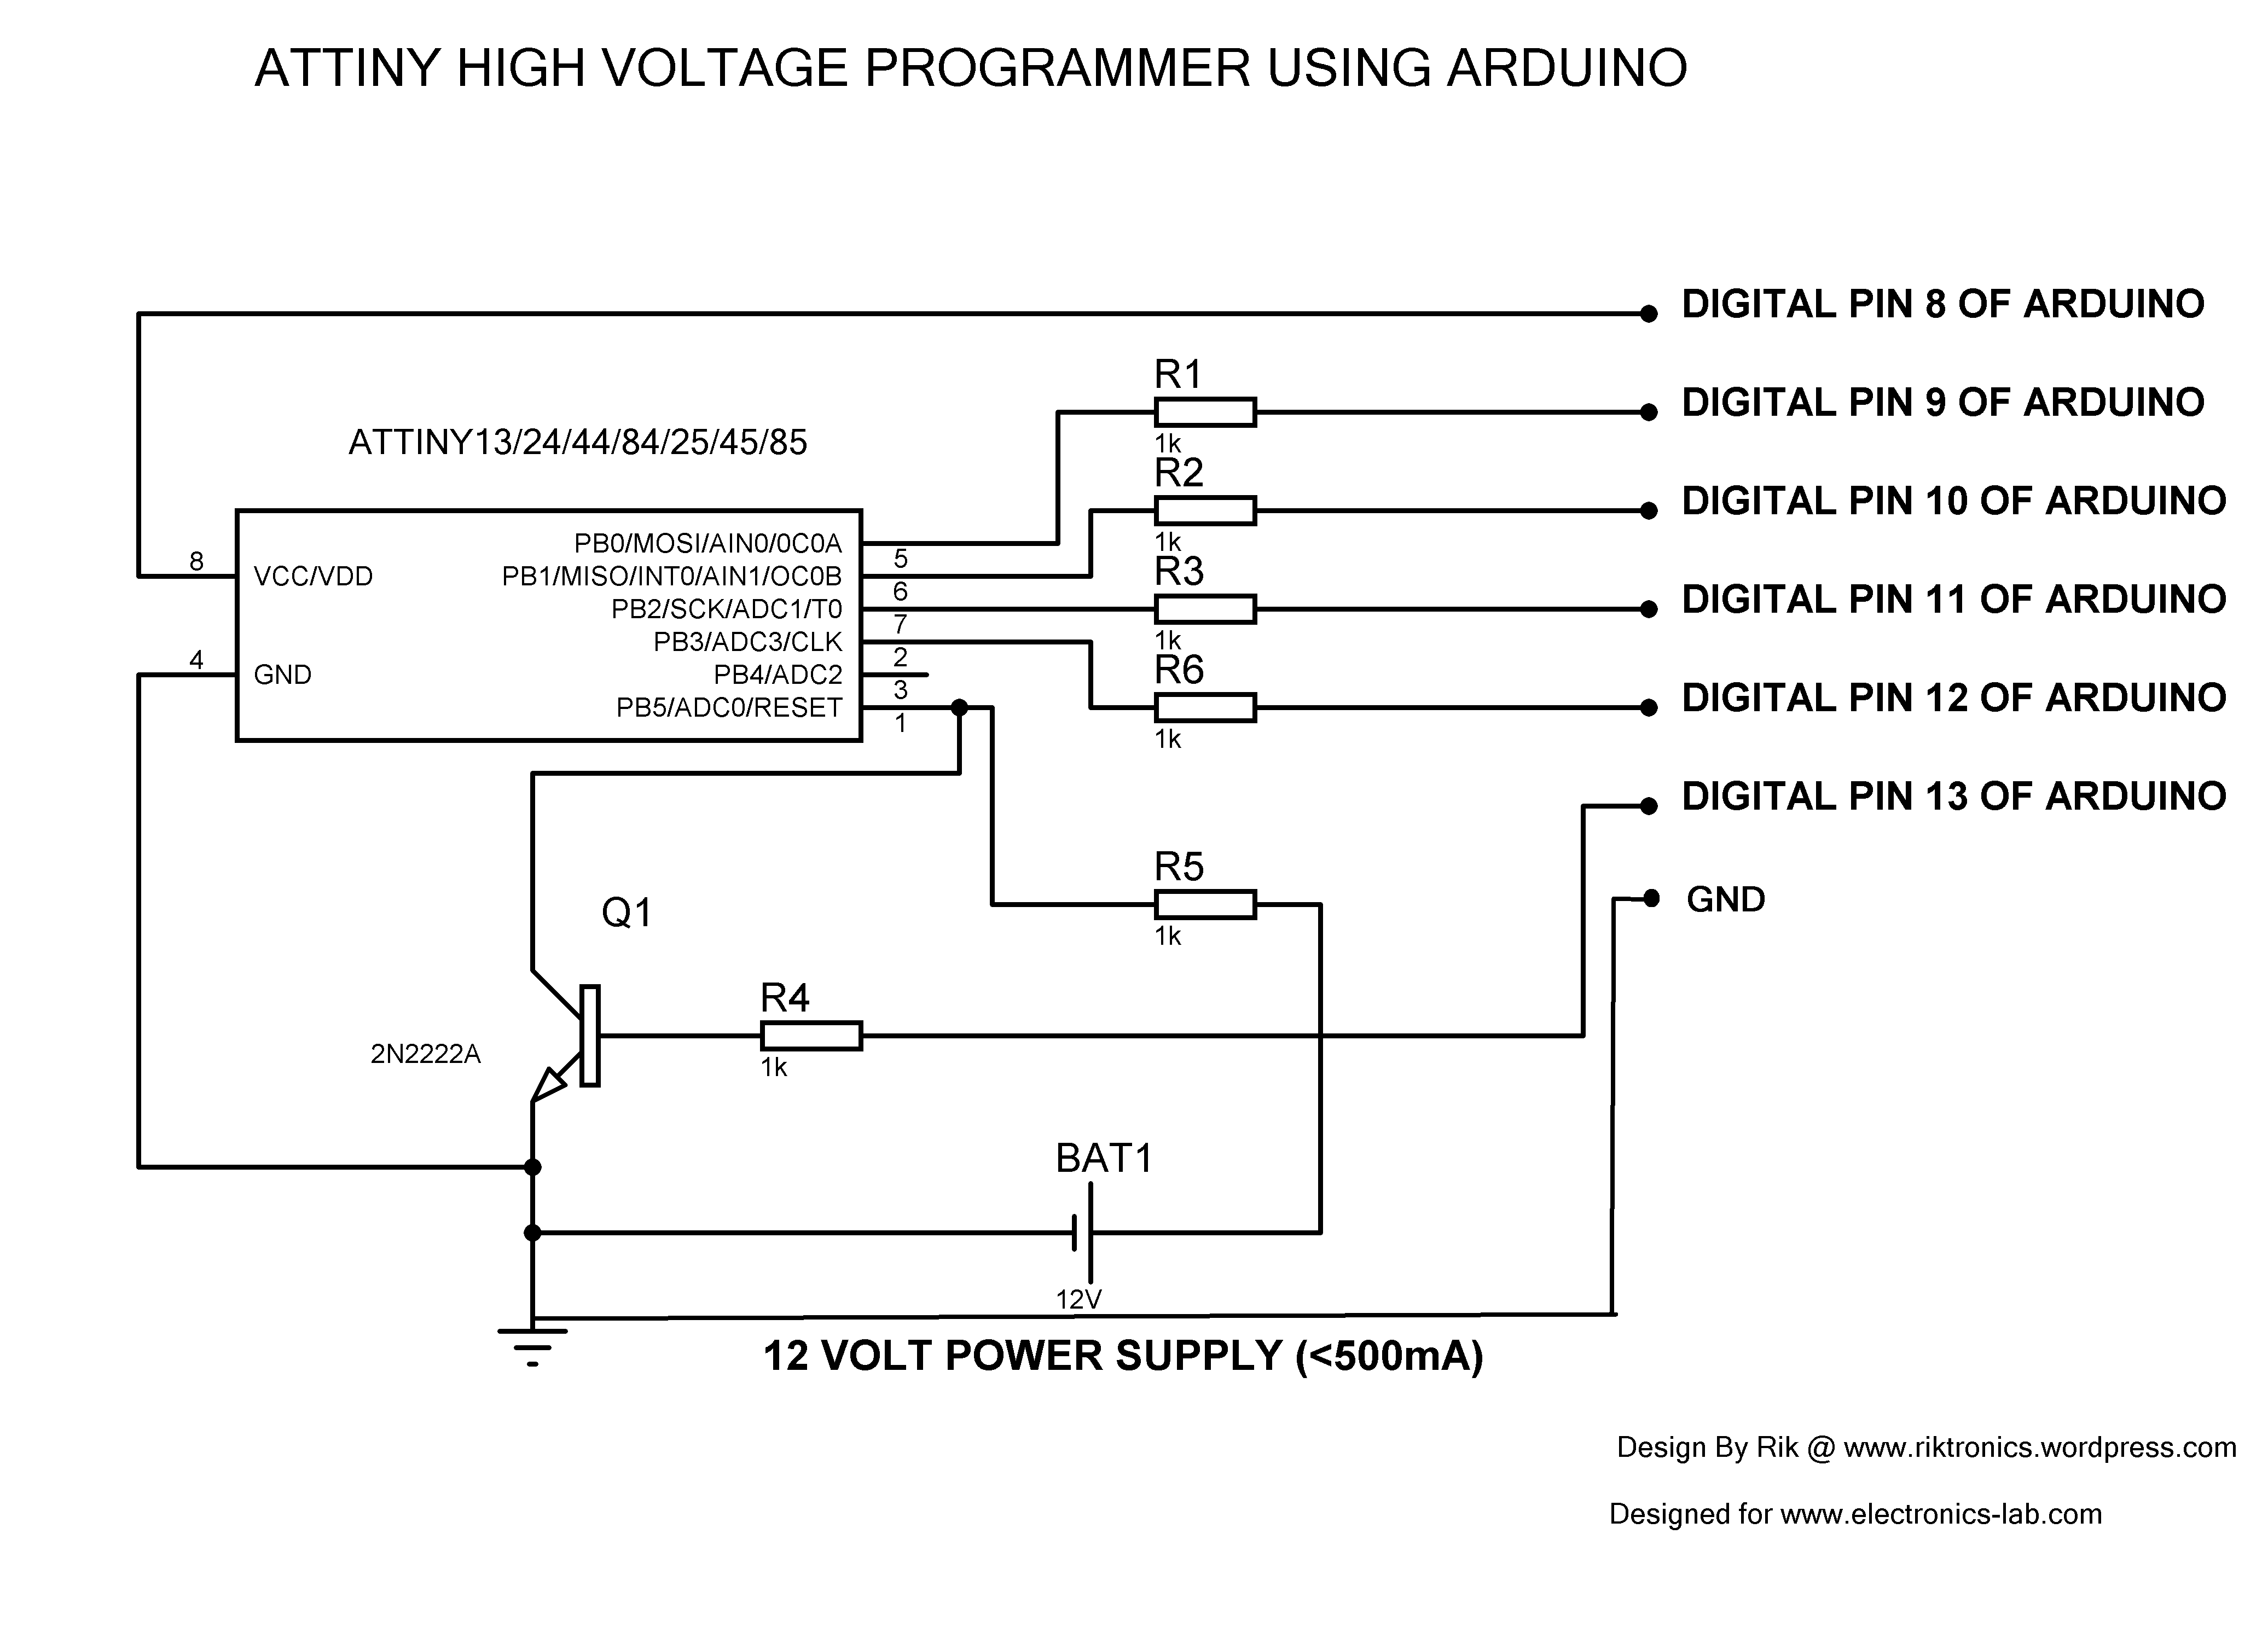
Upload the HVFuse sketch to the Arduino [available. Install the shield and apply +12VDC to the terminals on the left. Wait for the red LED to turn on. Install the ATmega to be repaired. Push the button. As soon as the LED turns off, the AVR is fixed and ready to be put back into service!
AC Voltage Measurement Using Arduino Guide for Beginners NerdyTechy
Top 10 Best Arduino in Los Angeles, CA - January 2024 - Yelp - Crash Space, Torrance Electronics, STEAM Bot Workshop, Deezmaker, NetKruzer Technologies, Great Minds Robotics, JK Electronics, Smart Electronics Repair, CodeRev Kids
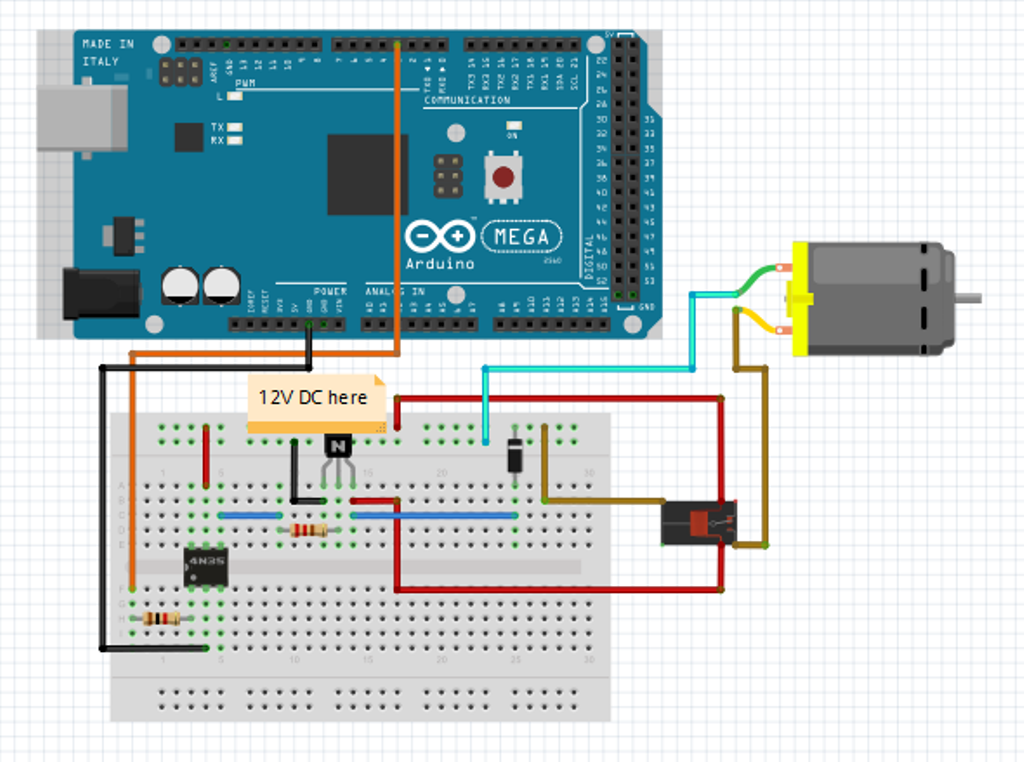
Lab Using a Transistor to Control High Current Loads with an Arduino Brandon Roots
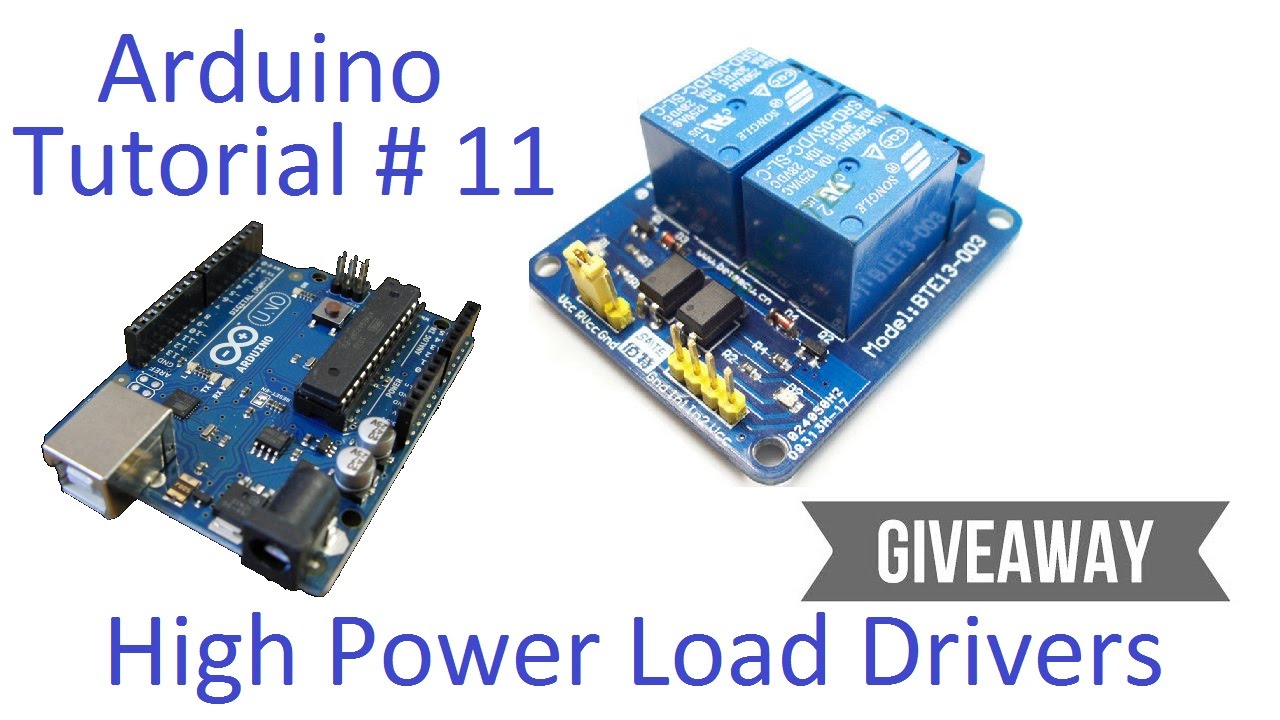
Unfortunately, you can't as the Arduino operates at 5V which means it can't control these higher voltage devices directly. However, with the help of a relay module to switch the high voltage, you can now use the Arduino to control those devices! Interested? Learn how to do it through this tutorial! This Arduino relay tutorial will cover:

How to use Arduino to read Voltage. YouTube
When using an Arduino, we often need to control more voltage/current than can be handled directly from the Arduino pins. Most Arduino pins can handle 5VDC and 20ma of continuous current. However, other sources suggest an Arduino I/O pin can handle 40ma as an absolute maximum (without damage to the Arduino).

Arduino Based High Voltage Serial Programmer YouTube
LOW The meaning of LOW also has a different meaning depending on whether a pin is set to INPUT or OUTPUT. When a pin is configured as an INPUT with pinMode (), and read with digitalRead (), the Arduino (ATmega) will report LOW if: a voltage less than 1.5V is present at the pin (5V boards)
Arduino AVR HighVoltage Serial Programmer
Then, the base current is 100/110 = 0.909mA. Since the output voltage of an Arduino GPIO is 5V in logic-high state, the base resistor (RB in the above schematic) value is 5 - 0.7/0.909= 4730Ω. For such a feeble current and small voltage, one 4.7KΩ ¼ W resistor is fine. If the circuit is used to drive inductive loads such as coils or motors.

How to Use Relays to Control HighVoltage Circuits with an Arduino Projects
The Arduino is CMOS but generally the easiest way is to look at the datasheet. For the ATmega328p (page 308) it states: LOW is between -0,5V and 0,3 x Vcc HIGH is between 0,7 x Vcc and Vcc + 0,5V So if the supply (Vcc) is exactly 5V would be LOW is between -0,5V and 1,5V HIGH is between 3,5V and 5,5V So note, its different on for example 4V!
Use Relays to Control HighVoltage Circuits with an Arduino
Simply put, with a relay your Arduino can control your coffee maker, a lamp, or other high voltage devices. In this tutorial we will learn how to control high voltage devices with an Arduino! Arduino Relay Tutorial for High Voltage Control As with most things Arduino, we're going to need a little code and we'll need an input.

Wise time with Arduino High voltage power sources for tubes (Nixie, VFD, Geiger)
Description Write a HIGH or a LOW value to a digital pin. If the pin has been configured as an OUTPUT with pinMode (), its voltage will be set to the corresponding value: 5V (or 3.3V on 3.3V boards) for HIGH, 0V (ground) for LOW.
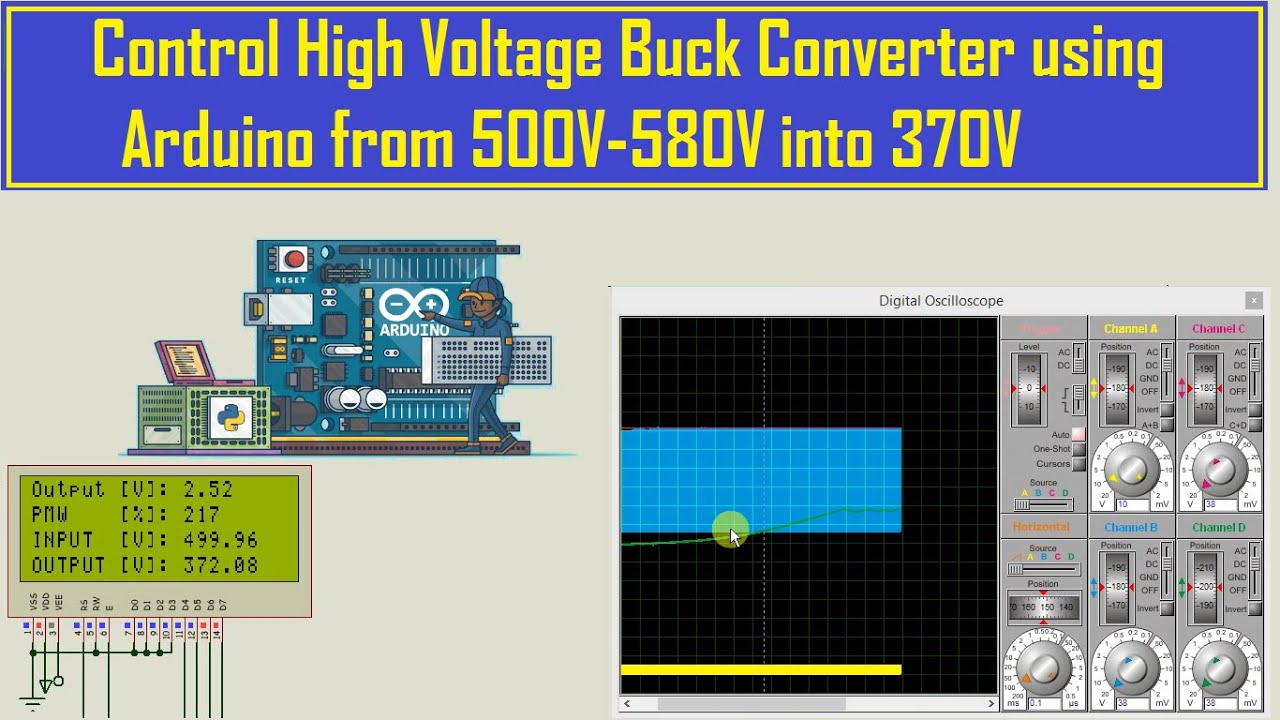
Control High Voltage Buck Converter using Arduino from 500V 580V to 370V YouTube
Another method, which I have used before and is reliable, is to use a diode and two resistors like below: The logic is that, when the input IN is > Vcc (5V) the signal on the I/O _IN will be the voltage of the pull_up resistor R2, if it is low or floating the signal will be low. R1 also gives a known logic state if the input floats.

High Voltage DC Voltmeter with Arduino UNO and OpAmp with Seven Segment display, (Measure 1500
First of all, you need to define the GPIO pin to operate in output mode in the setup () function, using pinMode () Arduino function as shown below. 1. pinMode(GPIO_pin, OUTPUT); Then you can drive the pin HIGH or LOW to change the digital state of that pin. You can turn the LED ON by writing a HIGH or 1, they're the same thing.

Arduino High Voltage Relay / Arduino how can run the relay module? Electrical / Want to
VCC = 2.4V - 5.5V "Min." means the lowest value where the pin is guaranteed to be read as high Is this correct? Given the conditions, that's my interpretation. retrolefty October 15, 2012, 7:14pm 3 holmes4: From the datasheet Section 28.2, for an UNO running at 5V a digital input will read high at a voltage of just 0.6V. Is this correct?. Mark

Arduino High Voltage Relay / Arduino how can run the relay module? Electrical / Want to
Fortunately, my trusty Arduino came to the rescue - I created an Arduino-based AVR programmer that uses the high voltage programming mode and can fix pesky fuses like RSTDISBL. The Arduino has just enough IO to implement the entire HV protocol plus a "go" button. So far I have only implemented setting LFUSE and HFUSE in software, but.
Arduino 11 High Current & Voltage Loads Tutorial Transistors and Relays YouTube
To control high-voltage or high-power circuits with an Arduino, you have to isolate them from the Arduino with a relay. Here's how! Circuits that operate at high voltages or at high currents cannot be controlled directly by an Arduino.

Use Relays to Control High Voltage Circuits with an Arduino YouTube
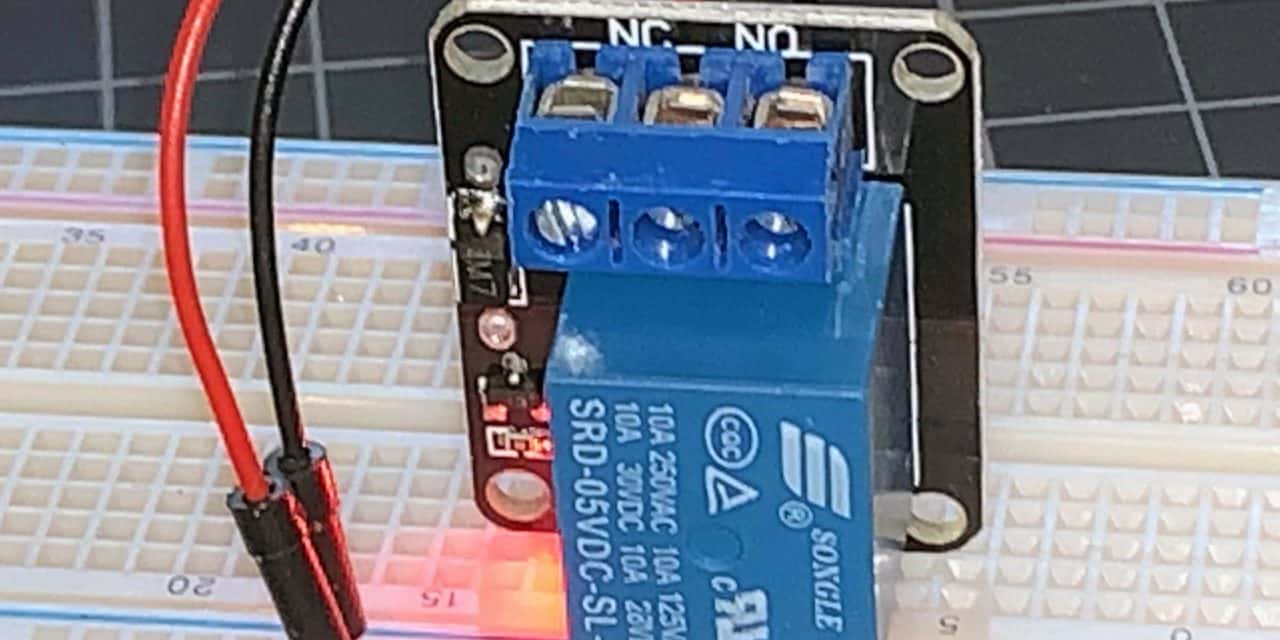
In this tutorial we will learn how to control high voltage devices using Arduino and a relay module. You can watch the following video or read the written tutorial below. Overview We can control high voltage electronic devices using relays. A Relay is actually a switch which is electrically operated by an electromagnet.
